Avoid These 5 Parker Garage Door Opener Repair Mistakes
Most garage door opener repairs do not fail because the original problem was too complex. They fail because of avoidable DIY mistakes that compound the issue while the homeowner thinks they are making progress. At Select Garage Doors, our team sees the same five mistakes on Parker service calls almost every week, and each one is preventable with five minutes of advance information.
The list below covers the five most-common DIY missteps, the right move for each, and a quick reference of when each crosses from fixable into call-a-tech-now territory.
1. Skipping the Power Disconnect Before Touching the Opener
The fastest way to turn a 20-minute repair into a trip to the emergency room is to leave the opener plugged in while working on the motor housing or wiring. A motor that briefly engages while your hands are inside the unit can cause serious cuts or pinch injuries. This is the single most-cited cause of DIY garage door injuries in residential settings.
What to do instead: Unplug the opener from the outlet before any work that touches the motor, the wiring, or the trolley. If the unit is hardwired (no plug), shut off the breaker that powers the opener circuit and verify with a voltage tester before starting.
2. Reaching for Whatever Tool Is Closest
A flat-head screwdriver substituted for a torque wrench, a hammer used to seat a roller, a pair of channel-lock pliers on a spring shaft. Each is a way to turn a small repair into a damaged component. Garage door hardware is designed around specific tool fits, and wrong-tool repairs almost always strip a bolt or warp a bracket.
What to do instead: Match the tool to the task. The minimum kit for residential opener repair includes a Phillips and a flat-head screwdriver, an adjustable wrench, a torque-rated wrench for bracket bolts, and a 1/4-inch socket adapter for the opener housing screws. Anything beyond this kit, like spring-tension work or cable replacement, is not a DIY repair.
3. Treating Maintenance as Optional
Most opener repairs that show up as emergency calls were preventable with 30 minutes of semi-annual lubrication and visual inspection. Dry hinges and rollers create the friction load that wears out the motor; ignored cable fraying turns into snapped cables. The opener itself is often the last component to fail in a chain of preventable wear.
What to do instead: Twice a year, lubricate hinges, rollers, spring coils (top side only), and the opener chain or screw drive with silicone-based or lithium grease. Visually inspect cables and panels for damage. Re-tighten any visible bolts that have loosened. Our Parker garage door maintenance visits handle this on a scheduled cadence if you would rather hand off the routine.
4. Diagnosing by Symptom Instead of Cause
The mistake here is assuming the obvious symptom is the root cause. A door that reverses on close is not always a sensor problem; it can be a worn roller creating a friction point the opener interprets as an obstacle. A motor that hums but does not move the door is not always a dead motor; it can be a disconnected trolley. Working on the wrong component because the symptom looked obvious is how a small parts swap turns into a major motor replacement.
What to do instead: Run a full diagnostic before replacing anything. The diagnostic order for any opener issue: power supply, sensor alignment, manual balance test, then opener-internal. Each step rules out a category of cause before you spend money on a fix.
5. Tightening Bolts Without a Torque Spec
Over-tightening cracks the bracket and warps the panel; under-tightening lets the bolt back out under vibration in days. The middle ground (manufacturer-specified torque) is published in the opener’s installation manual and the door’s spec sheet. Going by feel produces one of the two failure modes nearly every time.
What to do instead: Use a torque-rated wrench set to the manufacturer’s spec. For most residential bracket bolts, that range is 8 to 12 ft-lb. If the manual is missing, the manufacturer’s website almost always lists current torque specs by model.
When to Stop and Call a Tech
Some opener repairs are firmly in DIY range. Others cross a line where continued attempts make the problem worse or create real injury risk. The simple rule:
- Stop if the problem touches springs, cables, or opener motor internals. All three carry safety risks that need proper tools.
- Stop if you have replaced two parts and the symptom has not changed. That is a diagnostic failure, not a parts failure.
- Stop if you cannot find the manufacturer’s torque or alignment specs. Working by feel produces the mistakes above.
- Stop if the opener is over 15 years old and parts are hard to find. Repair-vs-replace economics flip past that age.
In any of those situations, the visit cost is offset by avoiding the secondary damage that wrong-direction DIY creates.
A quick reference on each mistake, the cost of getting it wrong, and the right alternative:
| Mistake | What It Costs | The Right Move |
|---|---|---|
| Skipping power disconnect | Injury risk and motor damage | Unplug, or shut off the breaker and verify with a tester |
| Using wrong tools | Stripped bolts, warped brackets | Match tool to task; rent a torque wrench if needed |
| Skipping maintenance | Premature motor failure | 30-minute routine twice a year |
| Diagnosing by symptom | Wrong-part replacement | Full diagnostic order before any swap |
| No torque spec | Cracked bracket or loose bolt | Torque-rated wrench, manufacturer spec |
When in doubt on any of these, our techs walk through the same diagnostic order on every Parker garage door opener repair visit.
Schedule Parker Garage Door Opener Repair
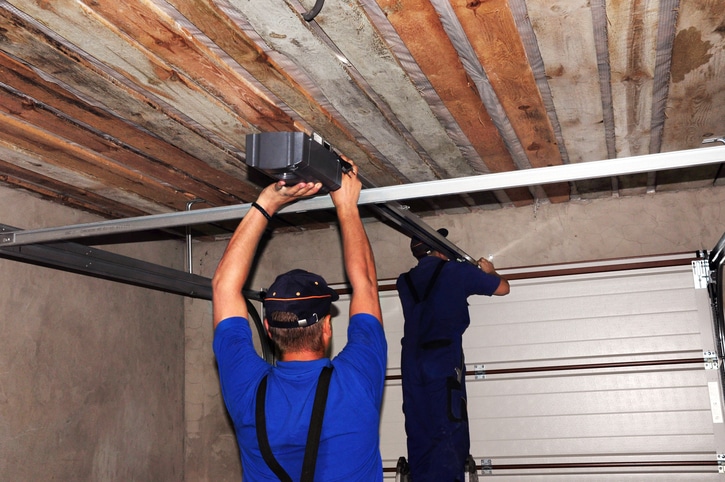
An opener that has been worked on incorrectly is harder to diagnose than one that has been left alone. At Select Garage Doors, our veteran-owned team starts every Parker service call with a full diagnostic before swapping any part, which catches the cascading issues that DIY missteps tend to create.
Reach our team at (720) 339-2442 to schedule a service call for your home. For service area details and current availability, contact us today.
Frequently Asked Questions
Which mistake on this list causes the most damage?
The wrong-tool mistake (#2). Using a flat-head where a Phillips belongs strips bolts; using channel locks on a spring shaft can warp the shaft. Damaged components turn a small repair into a larger one.
Is it actually dangerous to work on the opener with the power on?
Yes. The motor can engage if the wall control is bumped or the remote receives an unexpected signal. Hands inside the unit during that moment can sustain serious cuts or crushing injuries. Unplugging or shutting off the breaker is non-negotiable.
How do I find the correct torque spec for my opener model?
Start with the installation manual that came with the opener; most manufacturers also publish current specs on their website by model number. If the manual is lost and the model is over 15 years old, the manufacturer may have phased out support; in that case, work from generic residential opener spec ranges (typically 8 to 12 ft-lb for bracket bolts).
What is the cheapest mistake to avoid on this list?
Skipping maintenance. The 30-minute routine costs nothing beyond a can of lubricant and prevents most of the wear-related failures that bring the opener down. It is the strongest payback on the list.
If I have already made one of these mistakes, can it be reversed?
Usually yes, with the caveat that the secondary damage is sometimes worse than the original problem. A stripped bolt can be re-threaded or replaced. A warped bracket can be straightened or swapped. A damaged motor housing usually means a full replacement.
Is a torque wrench worth buying for a single repair?
For a single bracket-bolt repair, rent rather than buy. Most hardware stores rent torque wrenches for a fraction of the purchase price. For ongoing residential maintenance, a basic torque-rated adjustable wrench is a one-time investment that pays for itself across a handful of repairs.
What does “diagnosing by symptom” look like in practice?
The classic example: door reverses on close, so the homeowner buys new sensors. The actual cause is a worn roller creating friction the opener reads as an obstruction. New sensors do not fix the problem, and the original rollers stay worn. A full diagnostic order would have caught the roller before the sensor swap.
How often do these mistakes actually show up on service calls?
Almost every service call we make includes at least one of them. Skipped maintenance is the most common; we see it on most residential calls. Diagnosing by symptom is the second most-common. The other three appear in smaller but consistent percentages.


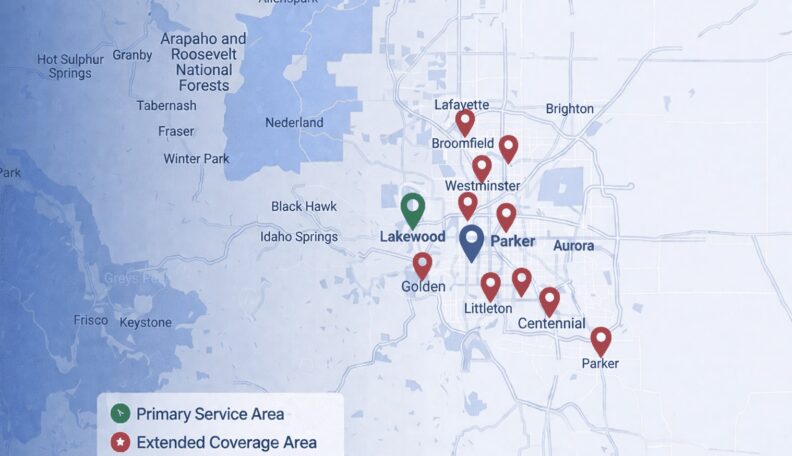
Service Area: 50+ Cities Across Metro Denver
Select Your Nearest Location
Hours: Mon-Fri 8am-5pm
Sunday Emergency Only
Avg Response Time: 18 minutes
Hours: Mon-Fri 8am-5pm
Sunday Emergency Only
Avg Response Time: 18 minutes
Hours: Mon-Fri 8am-5pm
Sunday Emergency Only
Avg Response Time: 18 minutes
Hours: Mon-Fri 8am-5pm
Sunday Emergency Only
Avg Response Time: 18 minutes
Hours: Mon-Fri 8am-5pm
Sunday Emergency Only
Avg Response Time: 18 minutes
Hours: Mon-Fri 8am-5pm
Sunday Emergency Only
Avg Response Time: 18 minutes
Hours: Mon-Fri 8am-5pm
Sunday Emergency Only
Avg Response Time: 18 minutes
Hours: Mon-Fri 8am-5pm
Sunday Emergency Only
Avg Response Time: 18 minutes
Hours: Mon-Fri 8am-5pm
Sunday Emergency Only
Avg Response Time: 18 minutes
Hours: Mon-Fri 8am-5pm
Sunday Emergency Only
Avg Response Time: 18 minutes
Hours: Mon-Fri 8am-5pm
Sunday Emergency Only
Avg Response Time: 18 minutes
Hours: Mon-Fri 8am-5pm
Sunday Emergency Only
Avg Response Time: 18 minutes
Hours: Mon-Fri 8am-5pm
Sunday Emergency Only
Avg Response Time: 18 minutes
Hours: Mon-Fri 8am-5pm
Sunday Emergency Only
Avg Response Time: 18 minutes
Hours: Mon-Fri 8am-5pm
Sunday Emergency Only
Avg Response Time: 18 minutes
We Service: Parker, Castle Rock, Greenwood Village, Lakewood, Littleton, Centennial, Highlands Ranch 40+ More Cities