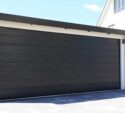
DIY vs. Pro Garage Door Opener Installation in Parker, CO
The DIY-to-Pro Threshold
Garage door opener installation crosses from DIY-friendly to “call a professional” along five clear thresholds. The breakdown below shows exactly where each one falls so you can decide before the toolbox comes out.
Some opener installs are weekend projects. Others are emergency-room visits in disguise. The difference comes down to five factors that most homeowners can self-assess in under five minutes: your skill level, the opener model’s complexity, the safety implications, the warranty terms, and the time you actually have. Get those right and DIY is a viable path; get them wrong and you’re paying for a callback plus the original install.
At Select Garage Doors, we get calls from Parker, CO homeowners who started DIY installs and stopped halfway when something didn’t go the way the YouTube tutorial showed. The breakdown below is built around what we see when we arrive on those calls, so you can decide before the install where you stand on each of the five thresholds.
Want a pro to take over from the start (or rescue a stalled install)? Contact us today for a no-obligation install consultation.
Honest Self-Assessment of Skills and Tools
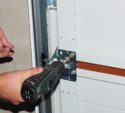
The first threshold is brutal but honest: do you have the skills and the tools? Garage door opener installation involves working overhead on a ladder, low-voltage wiring, mechanical alignment with a level, and force-setting calibration via small adjustments on the motor head. None of those individually is hard for an experienced DIYer; together, they require a comfort level with multiple disciplines on the same project.
DIY zone: you’ve handled overhead electrical work before, you own a multimeter and a torque wrench, and you’ve read the manufacturer’s instructions cover to cover before deciding to proceed.
Call a pro zone: you’re not comfortable on a ladder for an hour at a stretch, you don’t own basic mechanical tools, or you’re learning by watching videos as you go. The cost of one mistake exceeds the cost of professional install.
Complexity of the Opener Model You’re Installing
Basic chain-drive openers with manual wall buttons are at the simplest end of the spectrum. Smart belt-drive openers with Wi-Fi connectivity, battery backup, smartphone app pairing, multiple keypad codes, and rolling-code security are at the other. The instruction sheet thickness tells you which end you’re on before you start.
DIY zone: a basic chain or belt drive without smart features, replacing an identical existing unit on the same wiring. The install path is mostly bolt-by-bolt match-up.
Call a pro zone: a smart opener with Wi-Fi, multi-app integration, battery backup wiring, or any setup that requires new wall-button wiring or a different mount type than your existing opener. Each added feature adds a setup step that’s easier to get wrong than right.
Safety Risks With Springs, Cables, and Electrical Work
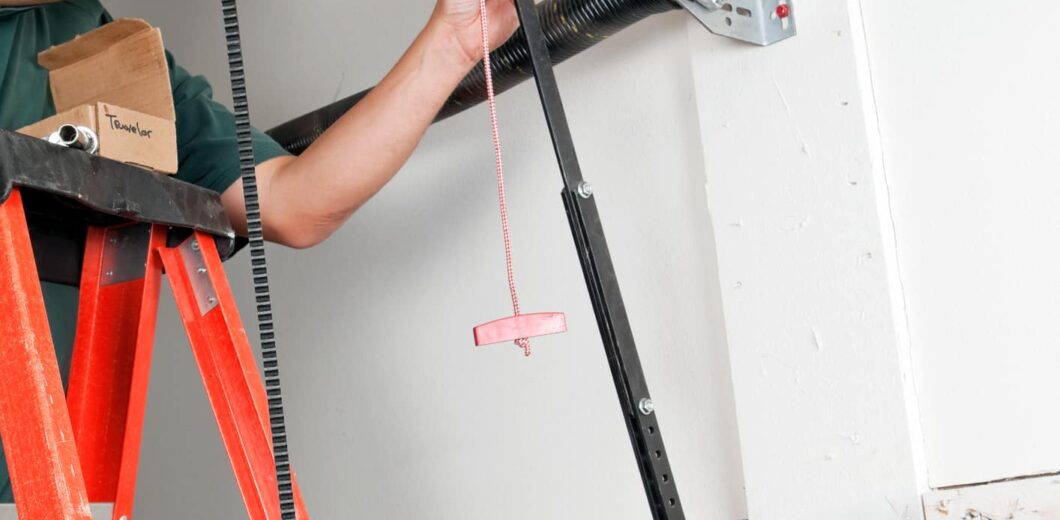
The opener itself doesn’t carry serious safety risk. What sits behind and around it does. Torsion springs hold hundreds of pounds of force. Cables can snap under tension if disturbed wrong. The opener mounts to ceiling framing that needs proper support. Disconnecting the existing opener and working around the spring and cable system is where DIY installers get hurt.
DIY zone: the spring system is in good condition, properly balanced, and you don’t have to touch it during the install. You unhook the existing opener, mount the new one, run wiring, and program it.
Call a pro zone: the spring is broken or worn, the door is unbalanced, the cables show wear, or the existing opener is integrated with the spring system in a way that requires working around tension. Spring repair is not a DIY task.
Warranty Validity and Insurance Coverage
Many opener manufacturers (LiftMaster, Chamberlain, Genie) require professional installation to maintain warranty validity, especially on premium models. A DIY install that goes wrong and voids the manufacturer warranty leaves you covering the full replacement cost yourself. Insurance is the other side: a professional installer’s general liability and workmanship insurance covers property damage and personal injury during the install, which your homeowner’s policy may not.
DIY zone: a basic opener with a transferable manufacturer warranty that doesn’t require professional install, and a homeowner’s insurance policy that explicitly covers DIY work.
Call a pro zone: a premium opener with a warranty that requires professional installation, or any opener where the manufacturer’s documentation says warranty validity depends on a licensed installer. Lose the warranty on day one and the savings disappear by year three.
Time, Tools, and How a Saturday Can Get Eaten
A professional install takes 3 to 4 hours including removal of the old unit. A first-time DIY install usually takes 6 to 10 hours, frequently stretching across a weekend if anything goes wrong (the wrong bracket size, a missing piece in the box, an unexpected wiring incompatibility). The hidden cost of DIY is the time it eats from the rest of your weekend, plus the trip to the hardware store mid-job for the part you didn’t know you needed.
DIY zone: you have a full Saturday clear, you’ve gathered every tool, screw, bracket, and wire ahead of time, and you have a backup plan if the install runs long.
Call a pro zone: you don’t have a clear day, the install needs to be done by a specific date (HOA inspection, vehicle returning from the shop, holiday travel), or you’d rather pay $200 for someone to handle it cleanly in a morning.
Task-by-Task DIY vs. Pro Recommendation
The table below breaks the install into individual tasks and shows where the DIY-pro line falls for each one. Use it to decide if you can split the work or if the whole project belongs with a garage door opener installation professional.
| Task | Risk Level | DIY or Pro Recommendation |
|---|---|---|
| Removing the old opener | Low (if spring is intact) | DIY for experienced homeowners |
| Mounting the new motor | Moderate | DIY with proper ladder and helper |
| Photo-eye sensor alignment | Moderate (UL 325 compliance) | DIY if you can verify alignment; pro otherwise |
| Force-setting calibration | High (safety implications) | Pro strongly recommended |
| Spring or cable work | Very high (injury risk) | Pro only, never DIY |
| Smart hub and app pairing | Low | DIY (app-guided setup) |
| Battery backup wiring | Moderate to high | Pro recommended (warranty considerations) |
Common DIY Mistakes That Trigger a Service Call
When DIY installs go wrong, they tend to go wrong in predictable ways. The five mistakes below are the ones we see most often on Parker callbacks.
- Photo-eye sensors mounted at the wrong height, causing the door to refuse to close or refuse to open after the install.
- Force settings left at factory defaults, too high for a lightweight door (door slams down) or too low for a heavy door (door stalls partway).
- Existing spring tension disturbed accidentally, causing the door to fall unexpectedly or the cable to snap during the first operation.
- Mount hardware secured to drywall instead of joists, which holds for a few cycles before pulling free under operating load.
- Smart hub pairing skipped or done wrong, leaving the homeowner with a functional opener but no app control or remote alerts.
Each of those triggers a service call that costs more than the original professional install would have. The DIY savings disappear when the technician has to undo and redo work.
Pick the Approach That Matches Your Setup
Going DIY is the right call when the install is simple, your spring system is in good shape, and you have a full day plus the right tools. Calling a pro is the right call when any of the five thresholds above lean the wrong way. The biggest mistake homeowners make is committing to DIY on the budget without honestly self-assessing the other four factors.
At Select Garage Doors, we’re a veteran-owned team based in Parker serving the Denver Metro area. We handle install jobs from start to finish or step in to fix stalled DIY installs. Give us a call at (720) 339-2442 before you spend a Saturday on it.
Frequently Asked Questions
What skills do I need to safely install a garage door opener myself?
Mechanical skills (using a torque wrench, ladder work for an hour or more), low-voltage wiring familiarity, and the patience to read manufacturer instructions cover to cover before starting. A multimeter and a basic socket set are the minimum tool kit. If any of those feel like a stretch, the install is borderline for DIY.
How much does a professional opener installation cost vs DIY?
Professional installation typically runs $150 to $300 in labor on top of the opener cost ($200 to $600 for the unit itself). DIY saves the labor but adds your time and the risk of mistakes that cost more than the labor would have. For a $600 total install, the labor share is roughly 25 to 50 percent, meaningful but not enough to justify a poorly done install.
Will DIY installation void my opener’s manufacturer warranty?
It depends on the manufacturer. Many premium brands (some LiftMaster and Chamberlain models, most commercial units) require professional installation to maintain full warranty coverage. Basic residential models often allow DIY, but you should check your specific opener’s documentation before starting. Lose the warranty on day one and the math changes fast.
What’s the most common DIY install mistake that requires a service call?
Misaligned photo-eye sensors are the single most common DIY mistake. The sensors mount at the bottom of each track and have to face each other within a small tolerance. A misalignment of a few degrees causes the door to refuse to close. Fix is usually 10 minutes, but it requires understanding what to look for.
Can I do part of the install myself and have a pro finish?
Yes, in some cases. Common splits: you remove the old opener and mount the new one, then a pro handles the force calibration, photo-eye alignment, and smart hub pairing. This works best when you flag the split upfront so the pro knows what’s already done. Most installers will quote a “partial install” appointment at reduced rates.
How do I know if my garage door is ready for a new opener install?
Three checks: pull the red emergency release cord and lift the door manually (it should hold position at waist height), inspect the cables for visible fraying or rust, and check the springs for gaps in the coil or visible wear. If all three pass, the door is ready. If any fails, a technician should handle the door issues before the new opener is installed.


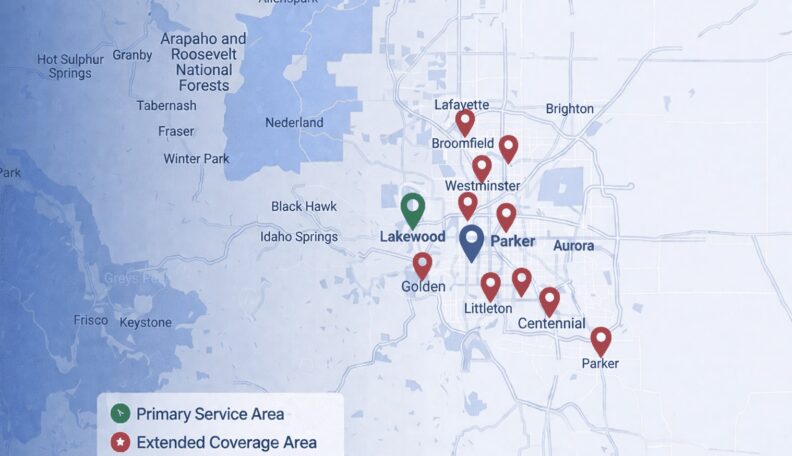
Service Area: 50+ Cities Across Metro Denver
Select Your Nearest Location
Hours: Mon-Fri 8am-5pm
Sunday Emergency Only
Avg Response Time: 18 minutes
Hours: Mon-Fri 8am-5pm
Sunday Emergency Only
Avg Response Time: 18 minutes
Hours: Mon-Fri 8am-5pm
Sunday Emergency Only
Avg Response Time: 18 minutes
Hours: Mon-Fri 8am-5pm
Sunday Emergency Only
Avg Response Time: 18 minutes
Hours: Mon-Fri 8am-5pm
Sunday Emergency Only
Avg Response Time: 18 minutes
Hours: Mon-Fri 8am-5pm
Sunday Emergency Only
Avg Response Time: 18 minutes
Hours: Mon-Fri 8am-5pm
Sunday Emergency Only
Avg Response Time: 18 minutes
Hours: Mon-Fri 8am-5pm
Sunday Emergency Only
Avg Response Time: 18 minutes
Hours: Mon-Fri 8am-5pm
Sunday Emergency Only
Avg Response Time: 18 minutes
Hours: Mon-Fri 8am-5pm
Sunday Emergency Only
Avg Response Time: 18 minutes
Hours: Mon-Fri 8am-5pm
Sunday Emergency Only
Avg Response Time: 18 minutes
Hours: Mon-Fri 8am-5pm
Sunday Emergency Only
Avg Response Time: 18 minutes
Hours: Mon-Fri 8am-5pm
Sunday Emergency Only
Avg Response Time: 18 minutes
Hours: Mon-Fri 8am-5pm
Sunday Emergency Only
Avg Response Time: 18 minutes
Hours: Mon-Fri 8am-5pm
Sunday Emergency Only
Avg Response Time: 18 minutes
We Service: Parker, Castle Rock, Greenwood Village, Lakewood, Littleton, Centennial, Highlands Ranch 40+ More Cities